Editing Campaign Management
Once the Campaign Management has been created, it needs to be configured to be able to use the Campaign Management. There are three sections under Campaign Management:
- Campaign Info
- Weblite Campaign
- Products
Campaign Info
User will need to enter the following details:
Field Name |
Mandatory |
Length |
Remarks |
Target/Segment |
No |
N/A |
|
Communication Mode |
No |
N/A |
|
Objective |
No |
N/A |
|
Cost per EDM/SMS/LBA |
Yes |
N/A |
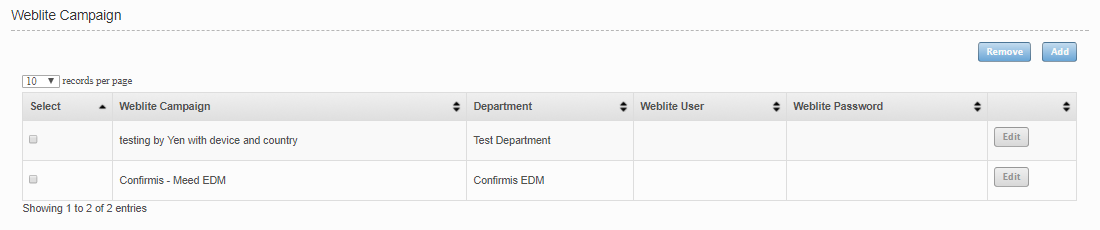
Weblite Campaign
To add the Campaign under Weblite Campaign section, click on “Add” button. A new window will be displayed as shown below:
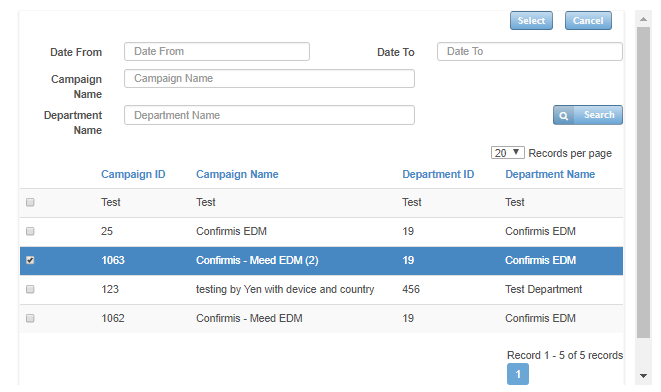
Users can search for the desired Campaign via Date Range, Campaign Name or Department Name. Select all that applies by ticking the checkboxes then click “Select” button.
Products
Products will be configured at this screen. Users will need to enter the following details:
Field Name |
Mandatory |
Length |
Remarks |
Brand |
Yes |
N/A |
Select Brand from the drop-down list |
Item Code |
Yes |
N/A |
Select the filter to used |
Once done configuring the Products, the user can now click on “Update” button.
After configuring the Campaign Management page, click on the “Save” button to save the information or click on “Cancel” button to cancel the action.
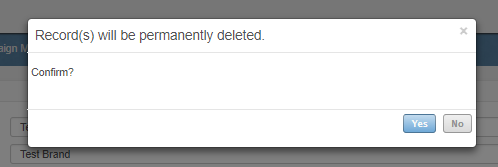
To delete Campaign Management, simply click on “Delete” button. A confirmation message will be displayed as shown below. Click on “Yes” button to confirm deletion.
Created with the Personal Edition of HelpNDoc: Easy EBook and documentation generator