Adding a new Member
Users are able to add new Member at this screen. Click on the “Add” button located on the top left-hand corner of the Member page. The Add Member window will be displayed as below.
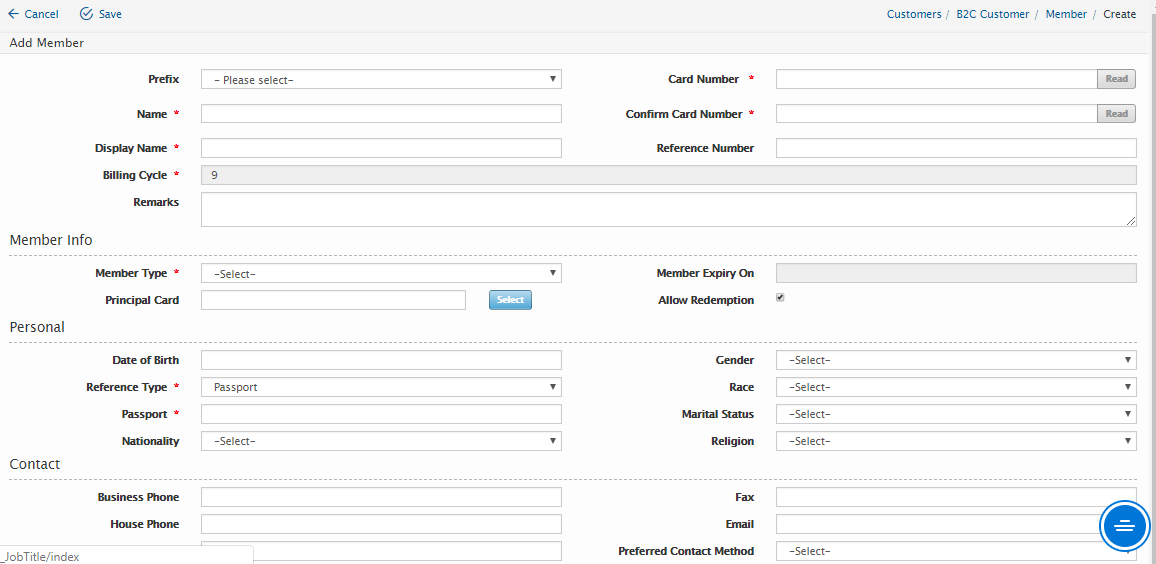
The Add Member window is divided into 5 different sections:
- Member Information
- Personal, Contact
- Correspondence Address
- Other.
The user will need to enter the following information (all fields marked with an asterisk are mandatory field):
Field Name |
Mandatory |
Remarks |
Prefix |
No |
|
Card Number |
Yes |
|
Name |
Yes |
|
Confirm Card Number |
Yes |
|
Display Name |
Yes |
|
Reference Number |
No |
|
Billing Cycle |
Yes |
Auto-populated |
Remarks |
||
Member Info Section |
||
Member Type |
Yes |
|
Member Expiry on |
No |
|
Principal Card |
No |
|
Allow Redemption |
No |
Tick to allow Redemption |
Personal |
||
Date of Birth |
No |
|
Gender |
No |
Options are provided in the drop-down box |
Reference Type |
Yes |
Options are provided in the drop-down box |
Race |
No |
|
Reference Type |
Yes |
Depending on the selected Reference Type |
Marital Status |
No |
Options are provided in the drop-down box |
Nationality |
No |
Options are provided in the drop-down box |
Religion |
No |
Options are provided in the drop-down box |
Contact |
||
Business Phone |
No |
|
House Phone |
No |
|
Mobile Phone |
Yes |
|
Fax |
No |
|
No |
||
Preferred Contact Number |
No |
|
Correspondence Address |
||
Street Address |
No |
|
State |
No |
|
City |
No |
|
Country |
Yes |
Options are provided in the drop-down box |
Postcode |
No |
|
Other |
||
Job Title |
No |
|
Educational Background |
No |
Options are provided in the drop-down box |
Income Level |
No |
|
Hobbies |
No |
Tick all that applies |
Interest |
No |
Tick all that applies |
Once all the mandatory fields are entered, the user can click on the “Save” button located on the top right-hand corner to save the information or click “Cancel” button to exit the Add Member page without saving the information.
Created with the Personal Edition of HelpNDoc: Free EPub producer