Editing Marketing Campaign
Users can modify the Marketing Campaign by clicking the Code to open. Modify the desired fields then click “Save” button to save the details or click “Cancel” button to cancel the action.
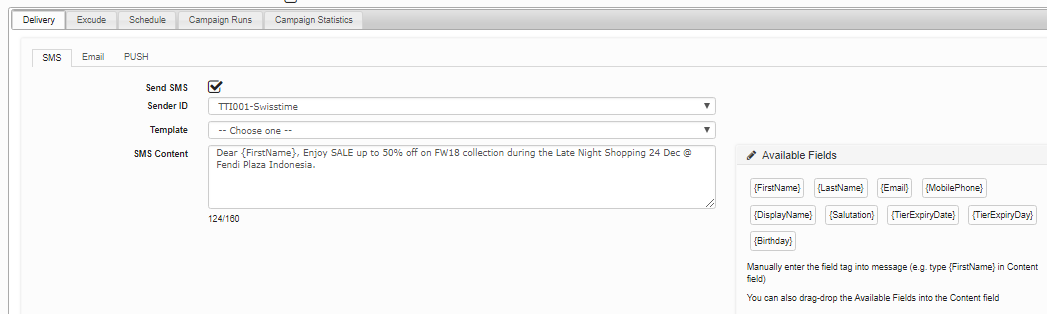
Delivery Tab
- It is the tab wherein you can find the different options in sending a campaign.
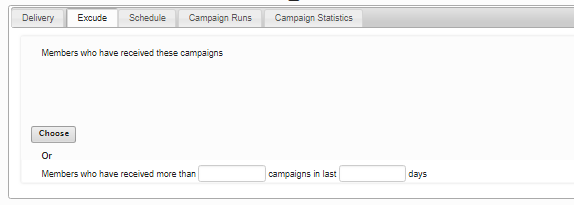
Exclude Tab
- It is the tab wherein you can drill down further the filter by excluding members based on the parameters you want to set.
- Members who have received these campaigns – Those members who received the selected campaign will be excluded from receiving the current campaign.
- Members who have received more than <number> campaigns in last <Number> days – you may set the number of campaigns received by a member within the number of days.
Example: Members who received more than 10 campaigns in the last 20 days.
This means all members who received more than 10 campaigns in the last 20 days will no longer receive this campaign.
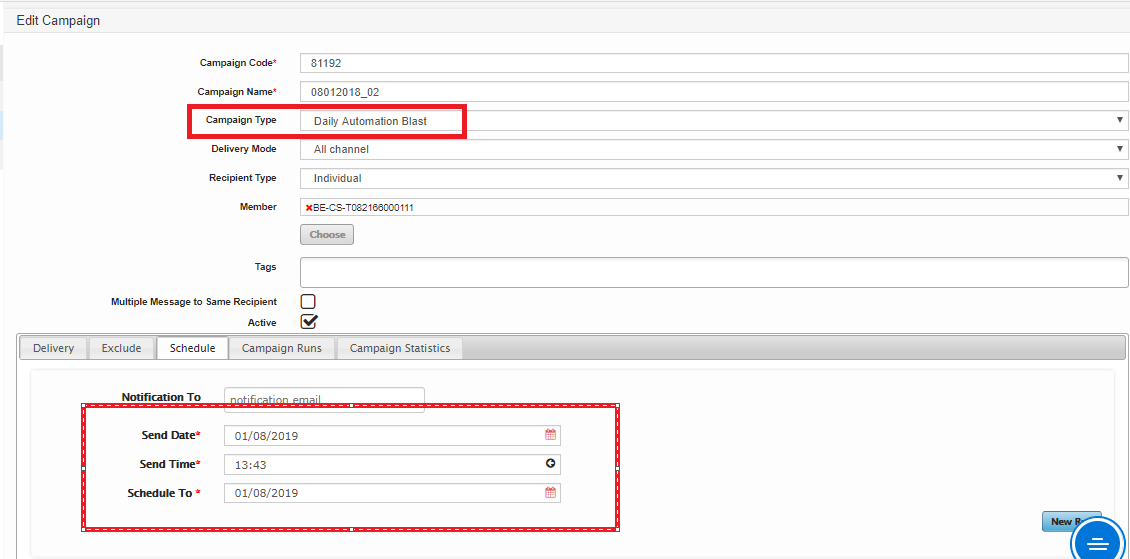
Schedule Tab
- It is the tab where you can set the schedule for the campaign to be sent.
- It depends on the the Campaign Type you have selected.
- If the Automation Type is “One-Time Marketing Blast”, you need to set the Send date and time.
- Please note that One-Time Marketing Blast type is run only once. Therefore, any changes or modification made in the campaign under One-Time Marketing Blast should be before scheduled run .

- If the Campaign Type is “Daily Automation Blast”, the Scheduled From and To dates as well as the time should be indicated.
Other fields to know:
Fields |
Details |
Notification To |
It is the email address where the system will notify that the campaign has been successfully sent. |
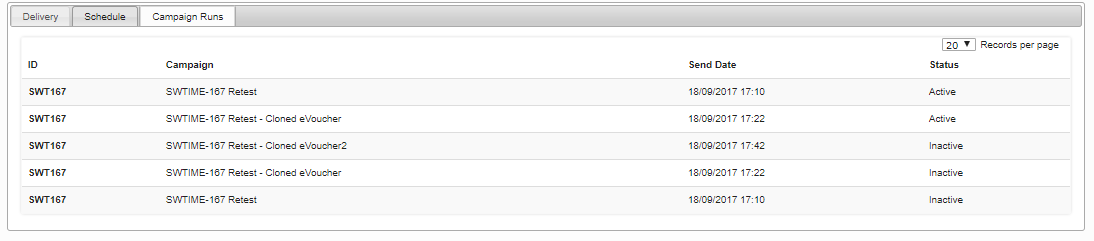
Campaign Run
- It is usefull feature to to clone existing campaign as parent-child (campaign run) concept . At the schedule tab, a new button “New Run” will clone parent campaign.
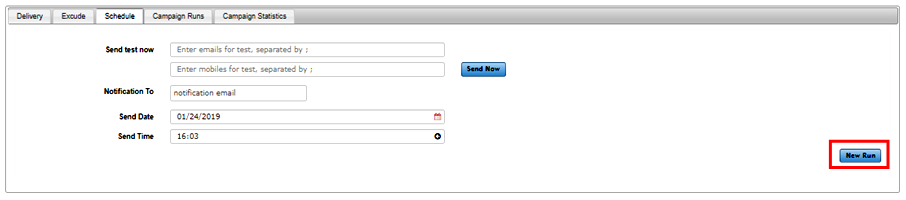
To send multiple Campaigns, click on “New Run” button, a cloned Campaign record will be displayed in Edit mode. Users need to update the following details:
Field Name |
Mandatory |
Length |
Remarks |
Campaign Name |
Yes |
50 Char |
Enter Campaign Name |
Delivery Mode |
Yes |
49 Char |
|
Recipient Type |
Yes |
N/A |
Recipient can be Individual Members or Member Group |
Member |
Yes |
N/A |
Select the Member or Group |
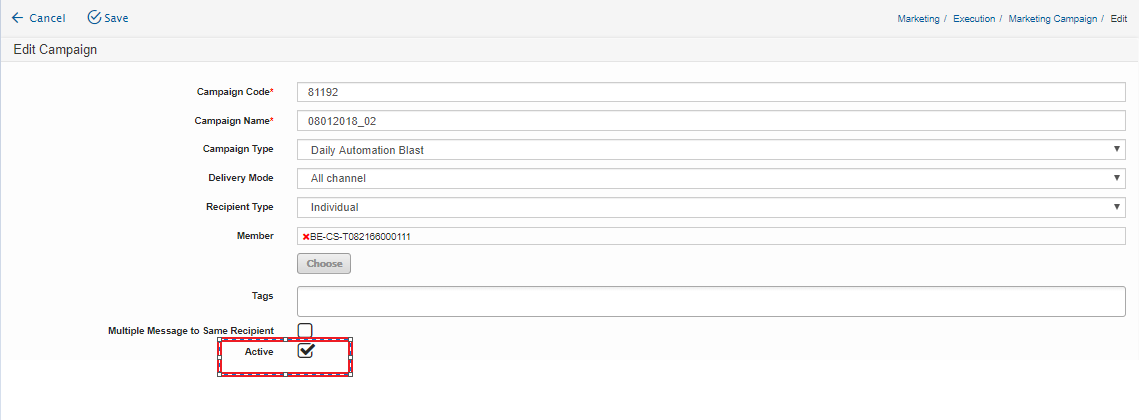
Active |
Yes |
N/A |
Tick to activate the Campaign |
After all the mandatory fields have been entered, click on “Save” button to save the details or just click “Cancel” button to cancel the action. Once saved, a record will be displayed under the Campaign Runs tab as shown below.
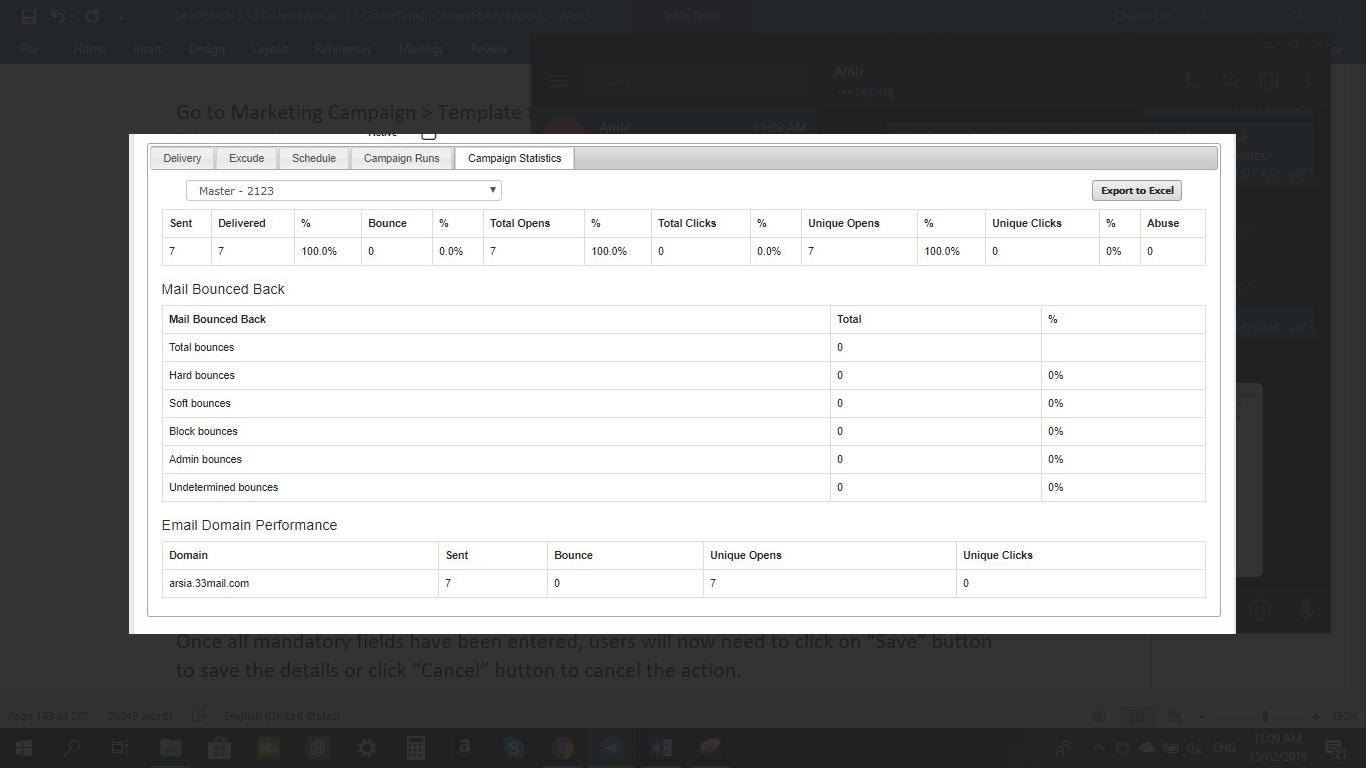
Campaign Statistics
- It is the tab wherein you can view the current status of the campaign.
- You have the option to export the record to Excel.
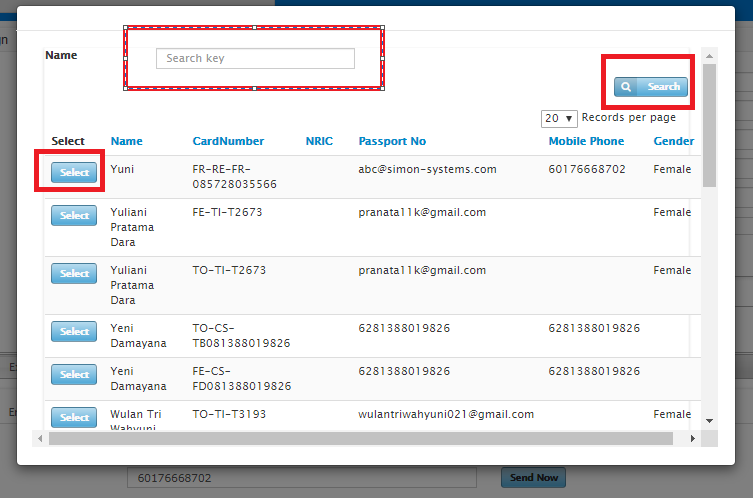
Test
Feature that giva ability to send test Campaign before run/excute with actual recepeints , Simple enter Emails at first field or Mobile No in Second field and Click on Send Now button ,Search and choose recepeint.

Active-Inactive Campaign
By Default any campaigned created is inactive Thus user required to Click on check box if intent to execute Campaign on scheduled Date-Time. Likewise user can inactive the active campaigns to prevent execution
Multiple Message to Same Recipient
Recipient of Campaign is based On Member Email/Mobile Number thus Campaign can be sent based on unique member or unique Email/Mobile Number . By default campaign will be sent based on unique Email/Mobile Number and by tick the check-box campaign will be sent based on Unique Member
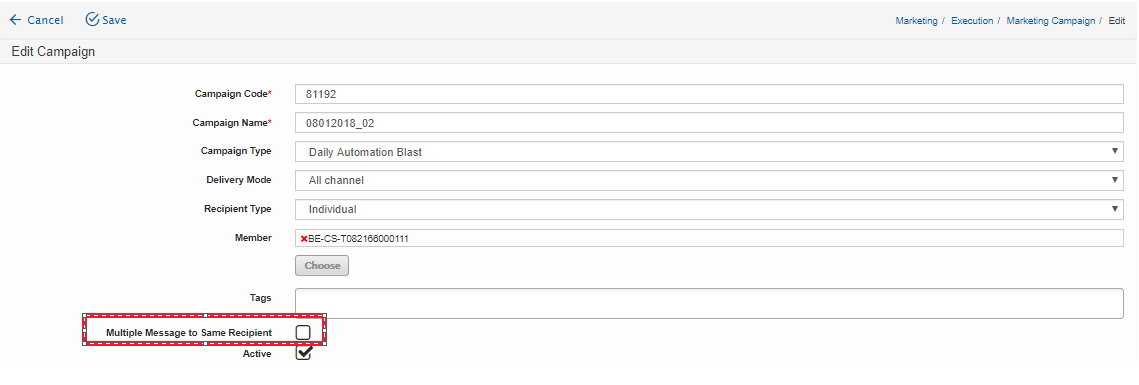
Note: If the check box is ticked means campaign will be sent based on Members even the Email/Mobile number be the same in multiple Members
Campaign Report
Click on Report tab to View/Export the Campaign's Report
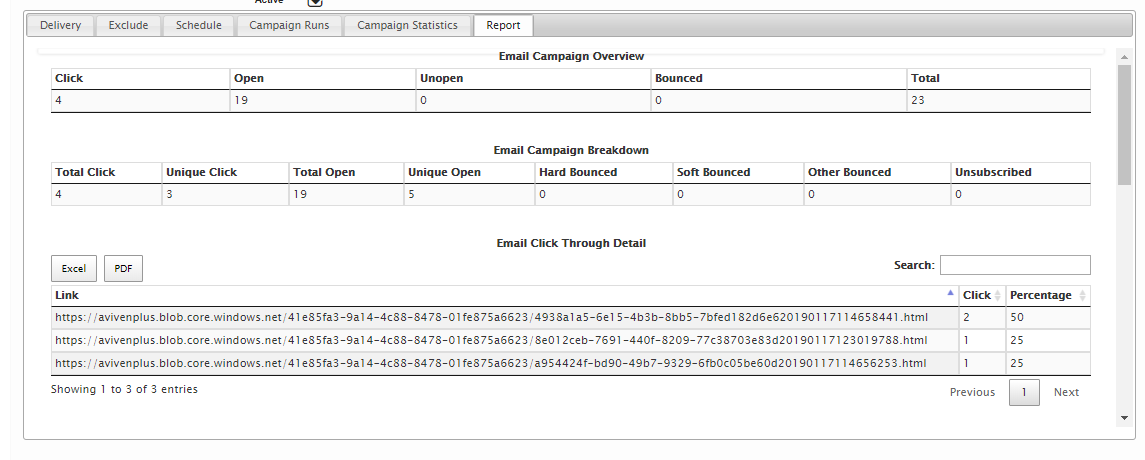
List of Available Report |
|
Report Name |
Exportable |
Email Campaign Overview |
No |
Email Campaign BreakDown |
No |
Email Click Through Detail |
Yes |
Email Country Breakdown |
No |
Email Device Breakdown |
NO |
Email Open Detail |
Yes |
Email Forward Detail |
Yes |
SMS Campaign Overview |
No |
Created with the Personal Edition of HelpNDoc: Generate EPub eBooks with ease